Complete QC Form
As a Quality Control Manager, this page is about the form you complete as part of quality control review. For the shared form behavior in SliceVault, see Forms in SliceVault.
Where the QC Form Appears
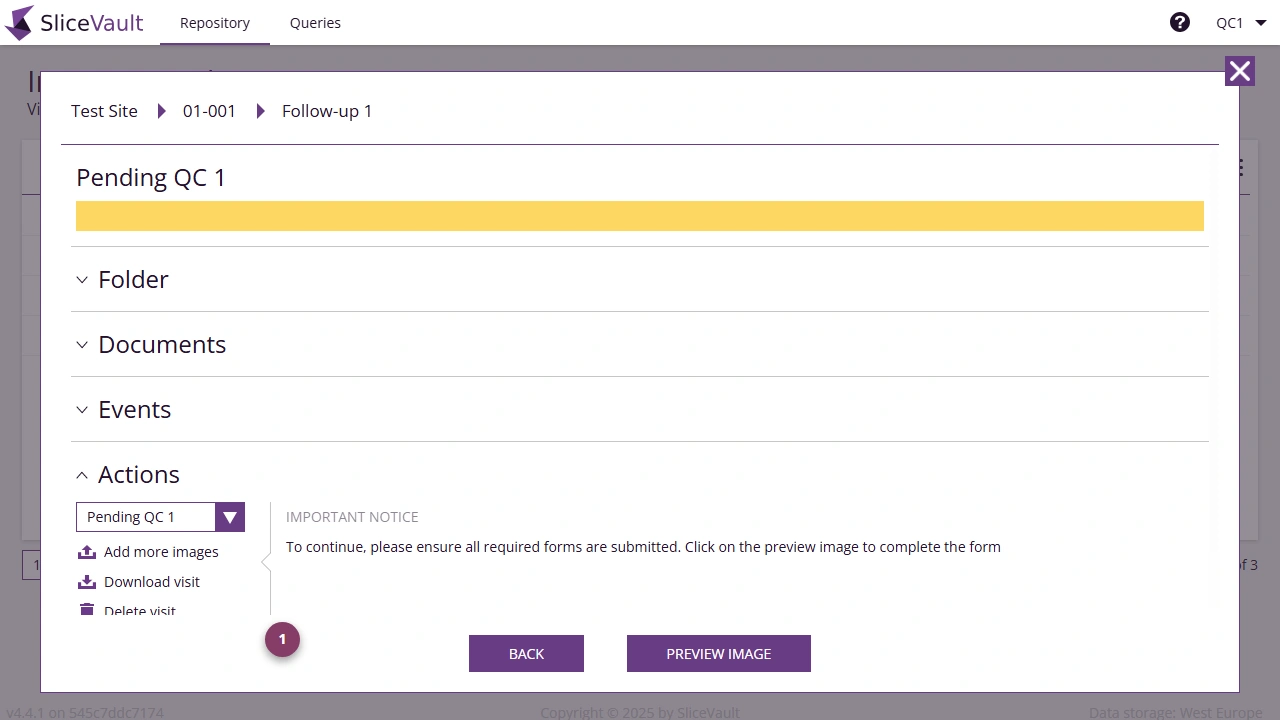
When a visit shows a yellow square in the repository for your QC step, open the visit and use Preview Image from the Visit Dashboard to access the QC form.
Complete the QC Form
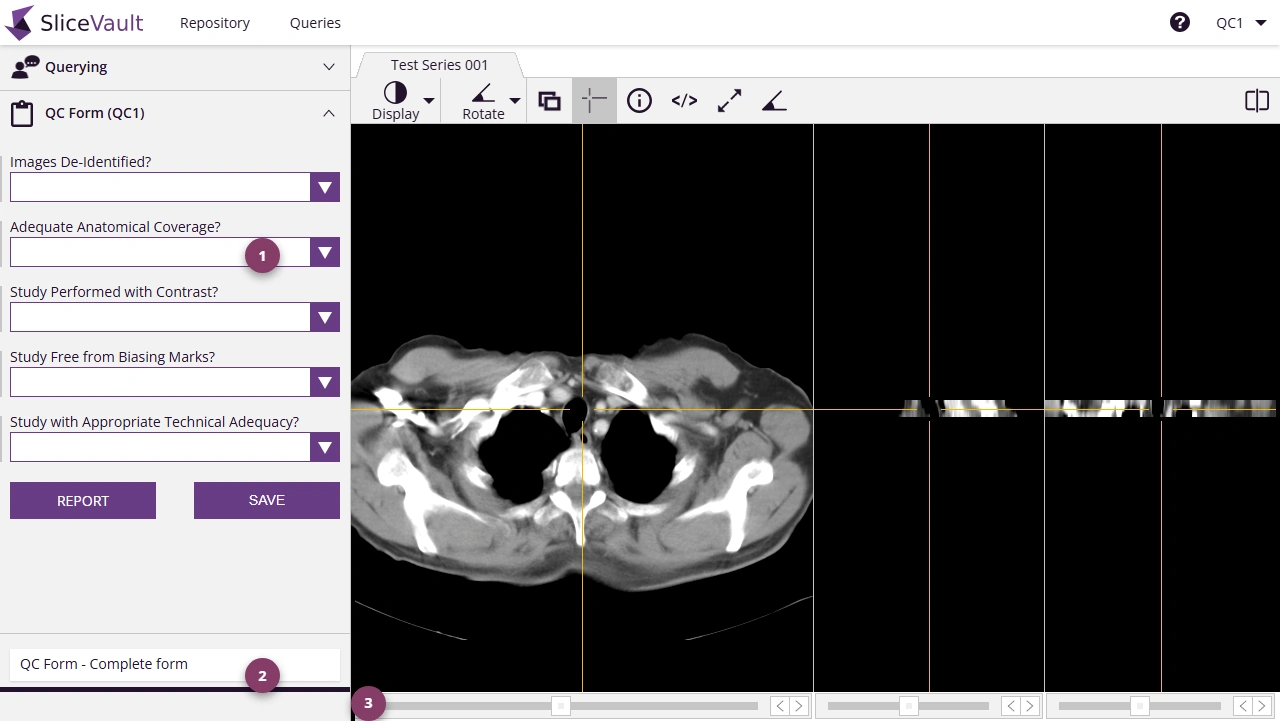
- Use 1 to move through the QC items.
- Use 2 to review the visible form section.
- Use 3 to complete the form and return to the Visit Dashboard.
If prompted, complete the electronic signature process before proceeding.
Reset or Reopen the QC Form
If the form needs to be cleared completely, use the reset action from the Visit Dashboard.
- Use 1 to reset the QC checklist when the whole form must be cleared and completed again.
If the form has been reopened for targeted edits instead of a full reset, continue to Edit a Completed QC Form.
If the visit still cannot move forward after the form is complete, see Why can’t I approve the visit?.