Need to Mask PHI?
Use Image Masking when burned-in annotations or visible text in the image itself still contain personal health information after upload.
Access note: This feature is only visible when the relevant add-on has been enabled for the study and assigned to your user account. If you cannot see it, contact your Trial Administrator or main study contact. Trial Administrators can review add-on access in Edit User Access.
Typical Users
- Investigators during upload review
- Quality Control Managers performing data cleanup
- Other users with image masking permission
What Problem It Solves
SliceVault automatically removes DICOM tag information, but text embedded in the image pixels may still need human review. Image Masking is the controlled way to cover that visible PHI.
How to Use It
Open the image in the DICOM Viewer, then open the masking tools.
- Hover over the Mask icon and click Draw Mask.
- Draw one or more masks over the areas that should be hidden.
- Right-click a mask if you need to remove it before saving.
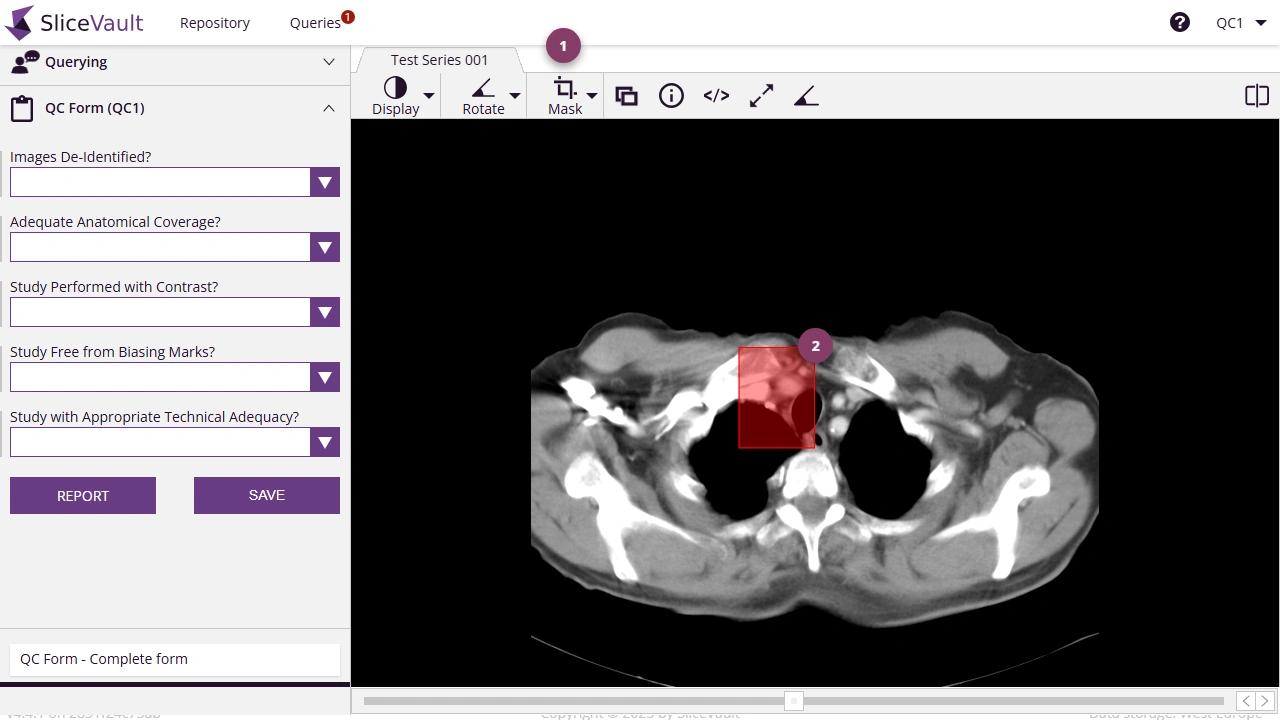
- Use 1 to review the masking tools after opening the masker.
- Use 2 to review or adjust the drawn mask on the image.
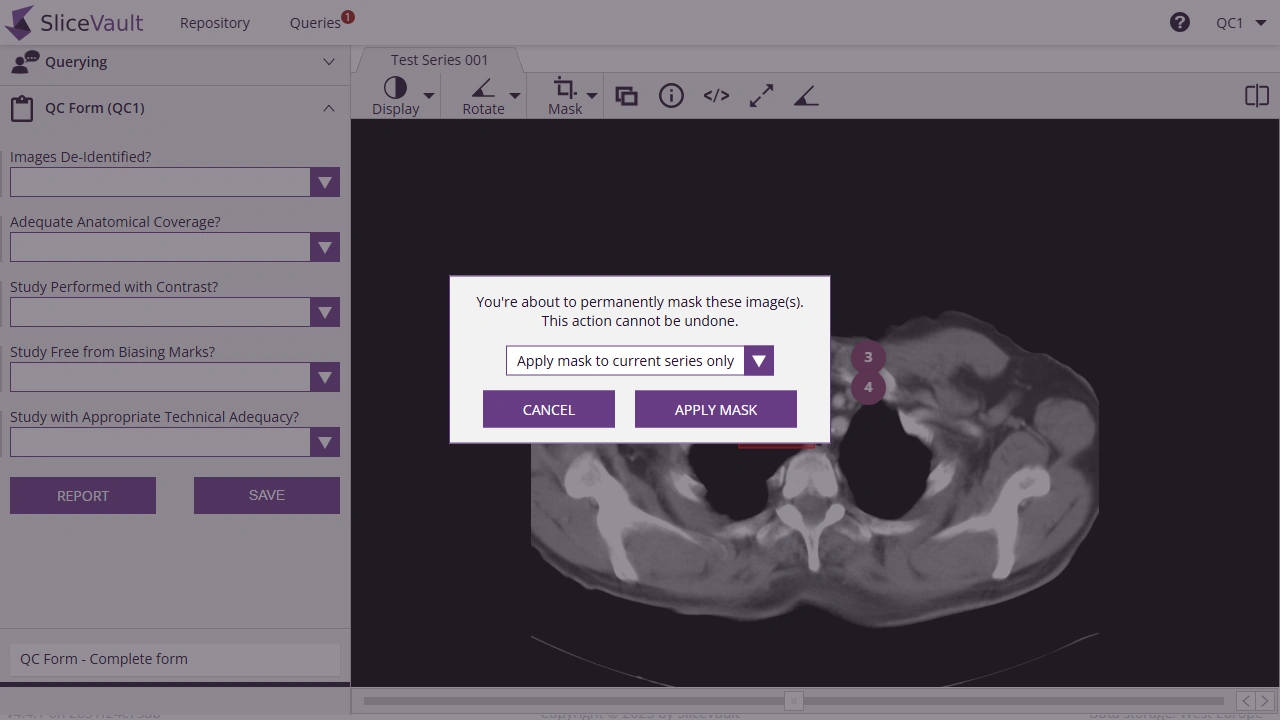
- Use 3 to choose the appropriate masking confirmation option.
- Use 4 to confirm the masking action in the dialog.
Important Notes
- This action overwrites the original displayed data.
- Once the mask is approved, it cannot be removed or edited.
- Processing may take time depending on the number of images.